Key Message Paragraph: Servicing a 30-year-old Vetus hydraulic steering ram is a viable and rewarding alternative to replacement. The process hinges on understanding its unique wire-lock end cap design and the critical importance of seal orientation and lubrication. By methodically replacing the hardened lip seals and O-rings, and carefully navigating sharp internal edges during reassembly, you can restore leak-free, reliable operation and extend the life of this robust marine hardware for years to come.
Author: Shayne and Anna
When a 30-year-old Vetus hydraulic steering ram starts leaking, the instinct might be to replace it. However, these units are built to last decades and often only need a seal refresh. Servicing them yourself isn’t just cost-effective; it’s a deep dive into robust marine engineering that will give you complete confidence in your steering system.
The key to a successful rebuild is understanding the ram’s unique construction and the critical role of seal orientation and lubrication. In this guide, based on a live repair, we break down the entire process.
The Teardown: A Unique Design
The first surprise for many is the Vetus design. Instead of a standard threaded end cap, these rams are secured by a circular stainless steel wire that sits in a groove, locking the cap in place.
- Accessing the Wire: A special C-spanner is used to rotate the end cap, aligning a small hole that gives you access to the retaining wire.
- Removing the Wire: The wire is carefully pried out as you rotate the cap. Once the wire is removed, the end cap can be pulled straight off, revealing the internal piston and seals.
This design is simple and effective but requires knowing the trick to disassembly, which is often the biggest hurdle for a DIYer.
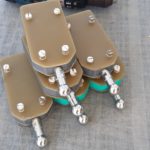
Seal Identification: Lip Seals vs. O-Rings
Inside, you’ll find two primary types of seals, each with a specific job:
- Lip Seals (Bucket Seals): These are on the piston itself. They are directional—the lip must face the correct way to function. Hydraulic pressure gets behind the lip, forcing it outward against the cylinder wall to create a dynamic seal. Installing them backward renders them useless.
- O-Rings: These are static seals, used to seal the end caps to the cylinder body. They are round in cross-section and seal by being compressed in a groove.
The Critical Rebuild Process
The rebuild is a lesson in patience and precision.
- Careful Removal: Old, hardened seals must be removed without scoring or damaging the critical bearing surfaces on the piston or the cylinder bore. We demonstrate using a pick on the “safe” side of the seal groove to avoid inflicting damage.
- Meticulous Cleaning: All grooves and surfaces must be spotless to ensure the new seals can seat perfectly.
- Strategic Lubrication: Using grease (or hydraulic fluid) is non-negotiable. It allows the new seals to slide over sharp machined edges without being cut, nicked, or twisted. A damaged seal during installation is an immediate failure.
- Precise Installation: Each seal must be carefully walked into place, ensuring the lips are facing the correct direction. The first seal going into the cylinder is at the highest risk of damage and requires the most care.
The Result: Like-New Performance
Once reassembled with the retaining wire carefully wound back into place, the ram is restored. The new seals eliminate play in the rod and stop all leaks, returning the 30-year-old unit to reliable, dependable service. This project proves that understanding the “why” behind the design is just as important as knowing the “how” of the repair.
Want More Projects?
Watch the videos on our other projects below and consider joining our Youngbarnacles Hub. Become a Member today for full access to our video archive and deep dives.
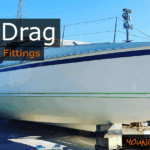
- Engineering a Flush Fit: Recessing Skin Fittings for Less Drag & Better Flow
 Key Message: On a performance vessel, every protrusion below the waterline creates drag and turbulence. By recessing standard dome skin fittings flush with the hull, we significantly reduce hydrodynamic resistance and, critically, provide cleaner water flow for systems like our watermaker. Author: Shayne and Anna Introduction: The Performance Penalty of Protrusions The pursuit of speed on… Read more: Engineering a Flush Fit: Recessing Skin Fittings for Less Drag & Better Flow
 - Hull Surgery: Uncovering the Truth Behind a Major Rudder ImpactKey Message: A proper repair requires understanding the original failure. By grinding back a poor previous fix, we uncovered the full story of a major grounding and executed a permanent, structural solution that also informs our future rudder design. Author: Shayne & Anna Introduction: Uncovering a Hidden Failure During our refit, a small, suspicious repair above… Read more: Hull Surgery: Uncovering the Truth Behind a Major Rudder Impact
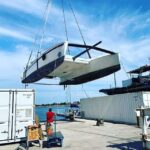
- Hauling Out Paikea: Why We Needed a Crane for Our CatamaranKey Message: Hauling a large catamaran is a significant logistical operation that requires meticulous preparation and the right equipment. When a travel lift isn’t an option, a crane becomes the necessary—and dramatic—solution. Author: Anna & Shayne A Long-Awaited Milestone After nearly three years of sailing and living aboard, the time had come for Paikea’s first haul-out… Read more: Hauling Out Paikea: Why We Needed a Crane for Our Catamaran
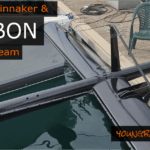
- Engineering a Carbon Fiber Front Beam & Longeron from America’s Cup MastsKey Message: By repurposing high-modulus carbon fiber from America’s Cup masts, we engineered a custom front-end system that is lighter, stronger, and far more functional than the original, unlocking new sail options and improving overall performance. Author: Shayne & Anna Introduction: A Dual Project Under Pressure This project captures the essence of our refit philosophy: ambitious,… Read more: Engineering a Carbon Fiber Front Beam & Longeron from America’s Cup Masts
- From Superyacht to Cruiser: How We Built a Square-Top MainsailPractical, budget-conscious performance sail upgrades using modern technology. Author: Anna Key Message: A high-performance sail upgrade is achievable on a cruiser’s budget through resourcefulness, smart material recycling, and modern techniques like 3D printing. Introduction The dream of a new, high-performance mainsail for our Catana 42, Paikea, was always tempered by the reality of its cost. Instead of… Read more: From Superyacht to Cruiser: How We Built a Square-Top Mainsail
- Major Hull Surgery: Transom Modifications, Fairing, and Sourcing an America’s Cup Rudder
 Executing multiple complex hull projects with a focus on structural integrity and performance gains. Author: Shayne & Anna Key Message: A systematic, professional approach allows multiple major refit projects to be run in parallel, turning a daunting workload into a series of manageable, high-impact upgrades. Introduction Transforming a boat’s hull lines is one of the most ambitious… Read more: Major Hull Surgery: Transom Modifications, Fairing, and Sourcing an America’s Cup Rudder
 - Saildrive Service Part 1: Removal and Inspection of a Volvo Penta S120Systematic disassembly and condition assessment of a marine saildrive unit. Key Message: A methodical approach to saildrive removal is critical for safety and efficiency, and a thorough inspection upon disassembly is essential for identifying wear and preventing future failure. Author: Shayne and Anna Introduction The rubber boot and internal seals on a saildrive are critical components for… Read more: Saildrive Service Part 1: Removal and Inspection of a Volvo Penta S120
- Saildrive Service Part 2: Reassembly, Corrosion Prevention, and ReinstallationSystematic reassembly of a marine saildrive unit with a focus on corrosion mitigation and correct installation procedure. Key Message: A successful saildrive service is defined by meticulous surface preparation, the use of specific corrosion-inhibiting compounds, and strict adherence to manufacturer torque and locking specifications. Author: Shayne and Anna Introduction Following the removal and inspection of the saildrive,… Read more: Saildrive Service Part 2: Reassembly, Corrosion Prevention, and Reinstallation
- Installing the Carbon Fibre Martingale: Precision Fitting & Engineering NuancesAuthor: Shayne & Anna TOPICS:This post details the final installation of a critical structural component on our Catana 42. It covers the transition from 3D CAD model to physical fitting, the use of specialist adhesives for marine composites, and an in-depth engineering discussion on the importance of pre-tensioning in fixed carbon fibre assemblies. This episode covers… Read more: Installing the Carbon Fibre Martingale: Precision Fitting & Engineering Nuances
- Beyond Flat Panels: Vacuum Bagging a Complex Carbon Fiber Beam-to-Hull JointTopic: Successfully vacuum bagging a structural joint is the true test of composite skill. This guide details the advanced techniques for consolidating a carbon fiber laminate on a complex, multi-dimensional beam-to-hull connection. We break down the entire process, from strategic surface prep and consumable strategy to the critical art of pleating, ensuring a perfect, bridge-free… Read more: Beyond Flat Panels: Vacuum Bagging a Complex Carbon Fiber Beam-to-Hull Joint