Author: Shayne and Anna
Key Topic: A successful project isn’t defined by a perfect process, but by the ability to adapt and salvage the result when things go wrong. Our cabin floor infusion, threatened by cold weather and material issues, became a masterclass in problem-solving, proving that recovery and resilience are just as valuable as meticulous planning in a boat refit.
Not every boat project goes smoothly, and sometimes the most carefully planned techniques need emergency repairs. Our latest cabin floor infusion turned into a masterclass in problem-solving when cold weather, questionable resin, and vacuum issues threatened to ruin the entire piece. Rather than starting over, we employed “infusion repairs” to salvage the job – demonstrating that sometimes recovery is more valuable than perfection.
The Perfect Storm: What Went Wrong
Several factors conspired against our infusion from the start:
Weather Conditions: Cold temperatures slowed the resin cure while affecting viscosity and flow characteristics, making proper infusion nearly impossible.
Resin Issues: A new tin of polyester resin immediately raised red flags with its unusual color, suggesting it may have been compromised or old stock with unpredictable gel times.
Vacuum Problems: Inadequate vacuum levels led to air entrapment, starring, and poor consolidation throughout the laminate.
Material Shortages: Attempting to save costs by reusing materials and skipping proper release agents created additional complications.
The Recovery Process: Infusion Repairs in Action
Rather than scrapping the entire floor, we implemented a multi-stage recovery process:
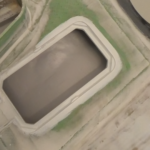
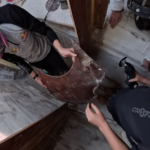
1. Initial Assessment: After the failed infusion, we carefully removed the vacuum bag to identify dry spots and poorly consolidated areas.
2. Secondary Infusion Setup: We reinstalled new infusion lines and mesh specifically targeting the problem areas, creating what’s known in composite work as “infusion repairs.”
3. Strategic Material Use: Despite the challenges, we maintained our commitment to reducing waste by reusing spiral tubes and vacuum bagging materials where possible.
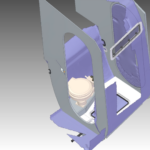
Smart Design: Hatches as Molds
One aspect that worked perfectly was our hatch integration method. By building and finishing the hatches first, we used them as precision molds to create recessed lips in the main floor panel. Using silicone spacers to maintain a perfect 1mm gap, we achieved seamless integration that would provide both structural integrity and clean aesthetics.
Key Takeaways for Future Projects
Don’t Fight the Weather: Composite work, especially infusion, has strict environmental requirements. Pushing forward in suboptimal conditions often costs more time than waiting for better weather.
Test Questionable Materials: Always test resin batches, especially if anything seems off about color, consistency, or smell.
Plan for Repairs: Having a backup plan for infusion repairs can save entire projects rather than assuming everything must work perfectly on the first attempt.
The Right Tool for the Job: As we explore in our members-only content, understanding when to use infusion versus vacuum bagging versus wet laminating is crucial – each method has its place in a comprehensive boat building approach.
Conclusion: Success Through Adaptation
The finished floor, despite its challenging birth, meets all our requirements for weight, strength, and functionality. More importantly, the process reinforced valuable lessons about flexibility in boat building and the importance of having recovery strategies when things don’t go according to plan.
Sometimes the most educational projects aren’t the perfect ones, but the ones that require creative problem-solving and persistence in the face of unexpected challenges.
Continue following our refit journey:
- Solving Boat Shower Drainage with Cardboard, CAD, 3D Scanning & 3D Printing
 The Hybrid Design Workflow: Building a Boat Shower Floor with Cardboard, CAD, and 3D Scanning: Walk through the hybrid design process for a custom boat shower floor. See how cardboard prototyping, CAD, 3D scanning, and 3D printing combine to solve complex drainage and access problems in a marine refit. Author: Shayne and Anna Introduction Designing… Read more: Solving Boat Shower Drainage with Cardboard, CAD, 3D Scanning & 3D Printing
 - The Boat Shower Floor Blueprint: Drainage, Hatches & Avoiding Bilge FloodsWhen your floor needs to drain, provide access, and never flood the bilge. A deep dive into the logic behind our custom shower hatch. Key Topic: Join Shayne & Anna in the bilges for a marine design deep-dive. We’re solving the boat shower’s trickiest puzzle: creating a floor that drains properly, includes mandatory access hatches,… Read more: The Boat Shower Floor Blueprint: Drainage, Hatches & Avoiding Bilge Floods
- Diagnosing and Repairing Hull Delamination and Core Damage.The Problem: From Floor Installation to Structural Repair Author: Shayne and Anna During the installation of new cabin soles in our Catana 42 refit, a routine task uncovered a significant structural issue. The discovery process is a textbook example of why systematic disassembly is critical. Initial Indicators: The Technical Failure:In a cored composite structure (like… Read more: Diagnosing and Repairing Hull Delamination and Core Damage.
- Re-Engineering a Hull: Load Paths, Daggerboards, and a New Structural BulkheadAuthor: Shayne and Anna Key Message: The most important part of a structural refit is understanding and optimizing load paths. By relocating a bulkhead to align with the strongest part of the daggerboard foil, we significantly increase Paikea’s structural integrity and sailing performance. Introduction: Identifying a Structural Flaw During Paikea’s refit, we noticed a discrepancy. On… Read more: Re-Engineering a Hull: Load Paths, Daggerboards, and a New Structural Bulkhead
- Refit Progress: Templating, Infusing, and Building a New Laminating TableKey Message: A major refit is a series of small, repetitive, and precise steps. By creating a family “assembly line” for templating and infusion, we’re efficiently producing lightweight, custom composite floors while constantly improving our workshop tools. Author: Anna & Shayne Introduction: The Flooring Assembly Line The transformation of Paikea’s interior continues, one floor panel at… Read more: Refit Progress: Templating, Infusing, and Building a New Laminating Table