The Problem: From Floor Installation to Structural Repair
Author: Shayne and Anna
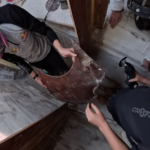
During the installation of new cabin soles in our Catana 42 refit, a routine task uncovered a significant structural issue. The discovery process is a textbook example of why systematic disassembly is critical.
Initial Indicators:
- A visible crack in a non-structural bulkhead.
- Hollow acoustic response (dull “thud”) when tapping the hull with a mallet, indicating skin-to-core separation (delamination).
- A localized area of completely fractured core material from a past point impact.
The Technical Failure:
In a cored composite structure (like a fibreglass/foam sandwich), the core’s primary function is to carry shear loads between the inner and outer skins. Delamination or core fracture compromises this, leading to localised flexing, stress concentrations, and progressive laminate failure. The cracked bulkhead was a symptom of this underlying lack of support.
The Professional Repair Methodology
The goal was not a cosmetic patch, but to restore and enhance the original structural integrity. This required a two-stage approach.
Stage 1: Core Rehabilitation with Structural Slurry
- Damage Mapping: The full extent of the delamination was marked by acoustic tapping.
- Skin Removal: The inner fibreglass skin over the damaged core was ground away.
- Slurry Application: A structural slurry (epoxy resin mixed with high-density filler) was worked into the exposed core. This mixture:
- Rebonds delaminated skin to the core.
- Fills and glues together fractured core cells.
- The filler reduces brittleness, preventing new crack propagation and restoring shear load capability.
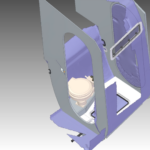
Stage 2: Structural Upgrade with a Composite Bulkhead
The original, cracked bulkhead was nominal. It was replaced with an engineered solution:
- A new foam-cored bulkhead was fabricated.
- It included a wide bonding flange, pre-taped with fibreglass.
- This assembly was laminated directly to the hull shell and designed to bond to the new cabin sole, creating a rigid, load-transferring structure that actively stiffens the hull.
Stage 3: Installation of the New Cabin Sole
With a solid substrate restored, the new infused-composite floor panel could be installed correctly:
- Precision templating ensured a perfect fit in the irregular bilge space.
- The floor was permanently bedded onto the prepared surface and the new bulkhead’s flange using the appropriate adhesive.
Result: The repair addressed the root cause. The hull section was returned to a monocoque state, with improved stiffness and a documented reduction in weight compared to the original structure.
Key Takeaways for Boat Owners and Builders
- Investigate Sounds: Use your ears to identify where delamination has potentially occurred.
- Understand the Core’s Job: Repairs must restore shear load capacity, not just fill a void.
- Slurry is Key for Core Repair: A resin/filler mix is structurally superior to resin alone for this application.
- Bulkheads Must Be Structural: If a bulkhead is near a high-load area, it should be properly integrated into the hull.
More on our Floors
Are you interested in learning more about the build on Paikea? Below are more videos on our floor upgrades: from heavy plywood floors to lightweight composite foam and glass. Our new floors have reduced weight by 100kg and Paikea is now stiffer and stronger than before.
- Solving Boat Shower Drainage with Cardboard, CAD, 3D Scanning & 3D Printing
 The Hybrid Design Workflow: Building a Boat Shower Floor with Cardboard, CAD, and 3D Scanning: Walk through the hybrid design process for a custom boat shower floor. See how cardboard prototyping, CAD, 3D scanning, and 3D printing combine to solve complex drainage and access problems in a marine refit. Author: Shayne and Anna Introduction Designing… Read more: Solving Boat Shower Drainage with Cardboard, CAD, 3D Scanning & 3D Printing
 - The Boat Shower Floor Blueprint: Drainage, Hatches & Avoiding Bilge FloodsWhen your floor needs to drain, provide access, and never flood the bilge. A deep dive into the logic behind our custom shower hatch. Key Topic: Join Shayne & Anna in the bilges for a marine design deep-dive. We’re solving the boat shower’s trickiest puzzle: creating a floor that drains properly, includes mandatory access hatches,… Read more: The Boat Shower Floor Blueprint: Drainage, Hatches & Avoiding Bilge Floods
- Diagnosing and Repairing Hull Delamination and Core Damage.The Problem: From Floor Installation to Structural Repair Author: Shayne and Anna During the installation of new cabin soles in our Catana 42 refit, a routine task uncovered a significant structural issue. The discovery process is a textbook example of why systematic disassembly is critical. Initial Indicators: The Technical Failure:In a cored composite structure (like… Read more: Diagnosing and Repairing Hull Delamination and Core Damage.
- Re-Engineering a Hull: Load Paths, Daggerboards, and a New Structural BulkheadAuthor: Shayne and Anna Key Message: The most important part of a structural refit is understanding and optimizing load paths. By relocating a bulkhead to align with the strongest part of the daggerboard foil, we significantly increase Paikea’s structural integrity and sailing performance. Introduction: Identifying a Structural Flaw During Paikea’s refit, we noticed a discrepancy. On… Read more: Re-Engineering a Hull: Load Paths, Daggerboards, and a New Structural Bulkhead
- Refit Progress: Templating, Infusing, and Building a New Laminating TableKey Message: A major refit is a series of small, repetitive, and precise steps. By creating a family “assembly line” for templating and infusion, we’re efficiently producing lightweight, custom composite floors while constantly improving our workshop tools. Author: Anna & Shayne Introduction: The Flooring Assembly Line The transformation of Paikea’s interior continues, one floor panel at… Read more: Refit Progress: Templating, Infusing, and Building a New Laminating Table