Introduction: The Flooring Assembly Line
The Process: From Cardboard to Composite
- Precision Templating (Ayden & Harry’s Domain): Using cardboard and a hot glue gun, they create exact templates of the complex shapes around the daggerboard case and hull sides. The key is building “extensions” on the template to account for gaps the old floors left, ensuring the new ones will be a perfect, structural fit.
- Drilling & Prep (Oliver’s Role): Once the shape is transferred to 20mm PVC foam, the panel is drilled with a grid of holes. These are essential for vacuum infusion, allowing resin to flow evenly through the core material.
- The Hatch Integration Method: For panels with access hatches, we use a clever multi-step infusion:
- Infuse the hatch separately.
- Finish and sand it.
- Use silicone spacer and temporarily plug it back into the floor panel as a mold insert.
- Infuse the entire floor panel, which now laminates a fiberglass lip around the pre-finished hatch, creating a seamless, strong integration.
Upgrading the Workshop: Building a Proper Laminating Table
Our old plywood laminating table was a constant battle. Despite sealing and envelope bagging, its porous nature caused air leaks, making it difficult to achieve a perfect vacuum for infusion.
The Solution: We built a new, truly non-porous table using scrap 20mm PVC foam. We butted the pieces together and will laminate a fiberglass skin over the top to create a perfectly flat, airtight surface. This table isn’t just a workshop upgrade; it’s a future piece of boat furniture, destined to become our new saloon or galley table.
Conclusion: Momentum Through Process
This stage of the refit is about momentum. By breaking down a massive job—replacing all the interior floors—into a repeatable process and getting the whole crew involved, we’re making steady, visible progress. Each infused panel is a step closer to a lighter, stronger, and modernized Paikea, and each tool we improve, like the new table, makes every future job that much easier.
Interested in Learning More?
This project builds on the core composite skills we’re constantly refining on Paikea. For more deep dives into our methods, check out these related resources:
- See our blog post on the lamination of our carbon stanchion sockets and the critical role of peel ply: Lamination Masterclass: Staunchion Sockets & The Truth About Peel Ply
- Or watch our video on the engineering behind our front beam, another major structural infusion project: Making our Carbon Front Beam & Longeron
See More of our Structural Floor Build.
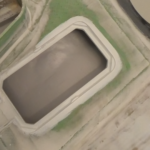
- Solving Boat Shower Drainage with Cardboard, CAD, 3D Scanning & 3D Printing
 The Hybrid Design Workflow: Building a Boat Shower Floor with Cardboard, CAD, and 3D Scanning: Walk through the hybrid design process for a custom boat shower floor. See how cardboard prototyping, CAD, 3D scanning, and 3D printing combine to solve complex drainage and access problems in a marine refit. Author: Shayne and Anna Introduction Designing… Read more: Solving Boat Shower Drainage with Cardboard, CAD, 3D Scanning & 3D Printing
 - The Boat Shower Floor Blueprint: Drainage, Hatches & Avoiding Bilge FloodsWhen your floor needs to drain, provide access, and never flood the bilge. A deep dive into the logic behind our custom shower hatch. Key Topic: Join Shayne & Anna in the bilges for a marine design deep-dive. We’re solving the boat shower’s trickiest puzzle: creating a floor that drains properly, includes mandatory access hatches,… Read more: The Boat Shower Floor Blueprint: Drainage, Hatches & Avoiding Bilge Floods
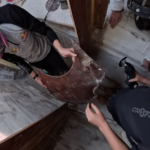
- Diagnosing and Repairing Hull Delamination and Core Damage.The Problem: From Floor Installation to Structural Repair Author: Shayne and Anna During the installation of new cabin soles in our Catana 42 refit, a routine task uncovered a significant structural issue. The discovery process is a textbook example of why systematic disassembly is critical. Initial Indicators: The Technical Failure:In a cored composite structure (like… Read more: Diagnosing and Repairing Hull Delamination and Core Damage.
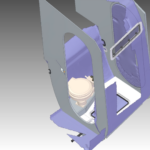
- Re-Engineering a Hull: Load Paths, Daggerboards, and a New Structural BulkheadAuthor: Shayne and Anna Key Message: The most important part of a structural refit is understanding and optimizing load paths. By relocating a bulkhead to align with the strongest part of the daggerboard foil, we significantly increase Paikea’s structural integrity and sailing performance. Introduction: Identifying a Structural Flaw During Paikea’s refit, we noticed a discrepancy. On… Read more: Re-Engineering a Hull: Load Paths, Daggerboards, and a New Structural Bulkhead
- Refit Progress: Templating, Infusing, and Building a New Laminating TableKey Message: A major refit is a series of small, repetitive, and precise steps. By creating a family “assembly line” for templating and infusion, we’re efficiently producing lightweight, custom composite floors while constantly improving our workshop tools. Author: Anna & Shayne Introduction: The Flooring Assembly Line The transformation of Paikea’s interior continues, one floor panel at… Read more: Refit Progress: Templating, Infusing, and Building a New Laminating Table
Interested in Learning More?
Join the Youngbarnacles Members Hub for access to our complete library of technical deep-dives, members only tutorials, and a community of serious builders.
Join the Youngbarnacles Membership