When your floor needs to drain, provide access, and never flood the bilge. A deep dive into the logic behind our custom shower hatch.
Key Topic: Join Shayne & Anna in the bilges for a marine design deep-dive. We’re solving the boat shower’s trickiest puzzle: creating a floor that drains properly, includes mandatory access hatches, and is designed so a pump failure never floods the bilge. See the full blueprint.
Authors: Shayne and Anna
Designing a shower floor for a boat isn’t about picking tiles. It’s a marine systems blueprint where drainage must meet mandatory access hatches, and the entire system must be designed so a pump failure doesn’t become a bilge flood. In our latest “Back in the Bilges” episode, we’re in the design trenches with Shayne and Anna, creating the blueprint for a shower that works, and lets you work on it.
The Core Contradiction: A Level Base vs. a Sloped Floor
The challenge starts with a fundamental conflict. For structural and fabrication reasons, you often build off a level base. But for function, you need a floor with a dedicated fall to a drain. On a boat, this isn’t just about comfort—it’s about preventing stagnant water and moisture damage.
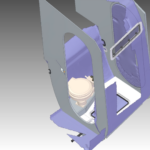
The Insight: “The issue is I’ve got a level cleat base all the way around the floor. And I now need to make the floor not level, but actually have a fall in it.”
This simple statement defines the entire project. The solution isn’t just slapping on a mortar bed; it’s designing a composite floor panel with a built-in valley, fabricated in sections to create the necessary slope from the get-go.
The Non-Negotiable: Underfloor Access Hatches
On a vessel, every compartment must have access to the hull. It’s a safety imperative for inspection and damage control. This means our shower floor can’t be a solid, molded piece. It must have a large, watertight hatch.
But this introduces its own problem: a hatch in the middle of a wet area is a potential flood gate to the bilge.
The “Aha!” Moment: Separating the Pump from the Panic
The classic boat shower failure mode is simple: the pump dies, the pan fills, and you only notice when water is over your ankles. The instinct is to put the pump directly under the hatch for “easy” access. We argued why this is a mistake.
The Logic: “If I had a problem with my pump and my pump was under my hatch… the moment I open my hatch, the water goes to sploosh into my bilge.”
Our solution? Geographic separation. The water drains from the shower pan, through a sealed tube in a bulkhead, to a pump located in a separate, dry compartment ahead. Now, if the pump fails, you can service it without flooding the bilge. This one design decision changes the entire user experience from panic to planned maintenance.
The First Line of Defense: The “Floating Lid” & Hair Filter
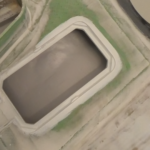
Knowing that hair is the primary culprit for pump failure, we added a smart filter. The drain sump has a removable stainless grate. And the cover for that sump? It’s designed to be buoyant.
The Feature: “This hatch here is going to be built of foam and glass that it actually just floats and lifts off… It immediately exposes the hole… and alerts you to the fact that the shower is flooding.”
It’s a simple, passive alert system. A floating lid turns a clog into a visible signal before the water level rises.
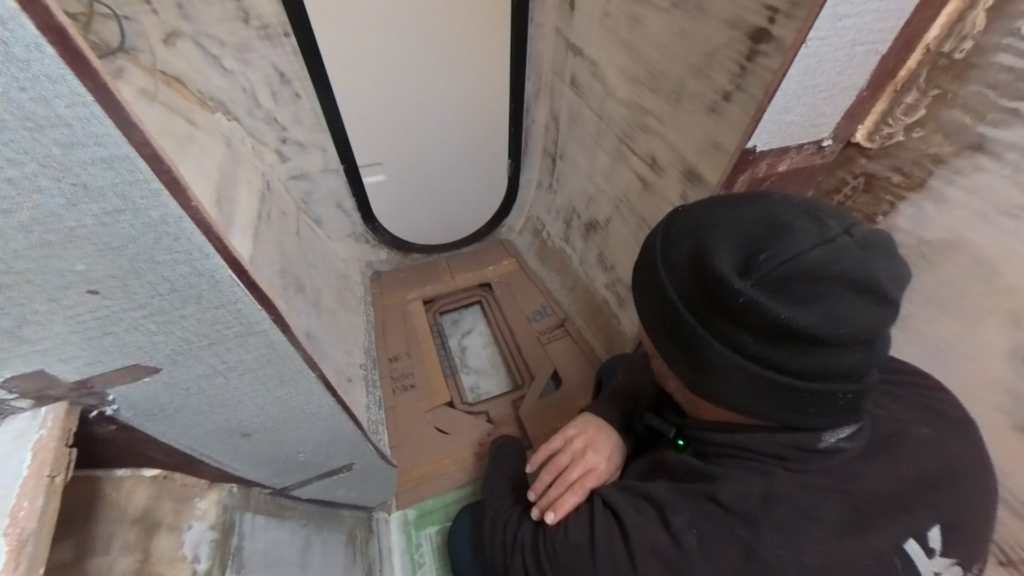
From Cardboard to Carbon: The Design Process
You can’t CAD everything. We moved from Cardboard Assisted Design (CAD)—a physical, touch-feely mockup that allows for sag and intuitive spatial planning—to precise computer modeling. This two-step process is vital. The cardboard catches the human factors; the computer model ensures the geometry is perfect for composite infusion and that every hose and wire run is planned, avoiding a “Swiss cheese” bulkhead.
Why This Blueprint Matters for Your Build
You might not be building a catamaran shower, but the principles are universal:
- Design for Failure. Assume critical parts (like pumps) will fail. How do you service them without making the problem worse?
- Separate Zones. Keep wet areas and critical machinery/electronics apart whenever possible.
- Build in Alerts. Simple, passive indicators (like a floating lid) are more reliable than hoping someone notices a small leak.
- Mock It Up, Then Model It. Never underestimate the value of a physical prototype.
More on our Floors
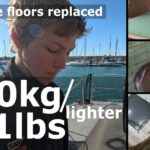
A major focus of our Paikea rebuild has been replacing all the timber floors and structure with composites. The result is dramatic: we’ve reduced the weight by 75%—the new floors weigh only a quarter of what was there before.
- Solving Boat Shower Drainage with Cardboard, CAD, 3D Scanning & 3D Printing
 The Hybrid Design Workflow: Building a Boat Shower Floor with Cardboard, CAD, and 3D Scanning: Walk through the hybrid design process for a custom boat shower floor. See how cardboard prototyping, CAD, 3D scanning, and 3D printing combine to solve complex drainage and access problems in a marine refit. Author: Shayne and Anna Introduction Designing… Read more: Solving Boat Shower Drainage with Cardboard, CAD, 3D Scanning & 3D Printing
 - The Boat Shower Floor Blueprint: Drainage, Hatches & Avoiding Bilge FloodsWhen your floor needs to drain, provide access, and never flood the bilge. A deep dive into the logic behind our custom shower hatch. Key Topic: Join Shayne & Anna in the bilges for a marine design deep-dive. We’re solving the boat shower’s trickiest puzzle: creating a floor that drains properly, includes mandatory access hatches,… Read more: The Boat Shower Floor Blueprint: Drainage, Hatches & Avoiding Bilge Floods
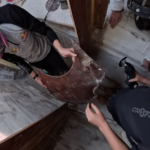
- Diagnosing and Repairing Hull Delamination and Core Damage.The Problem: From Floor Installation to Structural Repair Author: Shayne and Anna During the installation of new cabin soles in our Catana 42 refit, a routine task uncovered a significant structural issue. The discovery process is a textbook example of why systematic disassembly is critical. Initial Indicators: The Technical Failure:In a cored composite structure (like… Read more: Diagnosing and Repairing Hull Delamination and Core Damage.
- Re-Engineering a Hull: Load Paths, Daggerboards, and a New Structural BulkheadAuthor: Shayne and Anna Key Message: The most important part of a structural refit is understanding and optimizing load paths. By relocating a bulkhead to align with the strongest part of the daggerboard foil, we significantly increase Paikea’s structural integrity and sailing performance. Introduction: Identifying a Structural Flaw During Paikea’s refit, we noticed a discrepancy. On… Read more: Re-Engineering a Hull: Load Paths, Daggerboards, and a New Structural Bulkhead
- Refit Progress: Templating, Infusing, and Building a New Laminating TableKey Message: A major refit is a series of small, repetitive, and precise steps. By creating a family “assembly line” for templating and infusion, we’re efficiently producing lightweight, custom composite floors while constantly improving our workshop tools. Author: Anna & Shayne Introduction: The Flooring Assembly Line The transformation of Paikea’s interior continues, one floor panel at… Read more: Refit Progress: Templating, Infusing, and Building a New Laminating Table
- Mid-Refit Update: The Floor Replacement Hits HalfwayKey Message: Replacing an entire boat’s interior is a marathon, not a sprint. Hitting the halfway mark is a huge morale boost, proving the system works and the weight-saving benefits are real and tangible. Author: Anna & Shayne Introduction: A Major Milestone The methodical process of replacing Paikea’s heavy timber floors with lightweight composites has reached… Read more: Mid-Refit Update: The Floor Replacement Hits Halfway
- Salvaging a Failed Vacuum Infusion: How We Saved Our Boat FloorAuthor: Shayne and Anna Key Topic: A successful project isn’t defined by a perfect process, but by the ability to adapt and salvage the result when things go wrong. Our cabin floor infusion, threatened by cold weather and material issues, became a masterclass in problem-solving, proving that recovery and resilience are just as valuable as meticulous… Read more: Salvaging a Failed Vacuum Infusion: How We Saved Our Boat Floor
- Weight Saving & Structural Integrity: Rebuilding a Catamaran CabinAuthor: Shayne & Anna Topic: Follow the transformation of our forward port cabin, where we replace heavy original parts with lightweight composite structures while maintaining and improving the critical structural integrity of the hull. The refit of Paikea’s forward port hull represents a perfect convergence of our goals: significant weight reduction without compromising—and often enhancing—structural strength. In this phase,… Read more: Weight Saving & Structural Integrity: Rebuilding a Catamaran Cabin
- The Refit Grind: How a 22kg Floor Fits Into a 600kg Weight LossAuthor: Shayne and Anna Key Message: By replacing a heavy, non-structural plywood floor with a custom composite one, we achieved a monumental 75% weight saving in this area—transforming 30kg of dead weight into an 8kg structural component that actively strengthens the hull. In boat building, every kilogram saved is a win. So, when we weighed the old,… Read more: The Refit Grind: How a 22kg Floor Fits Into a 600kg Weight Loss