
Transforming Paikea’s Transom:
A Functional & Aesthetic Upgrade
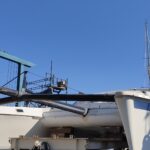
Transom Modification
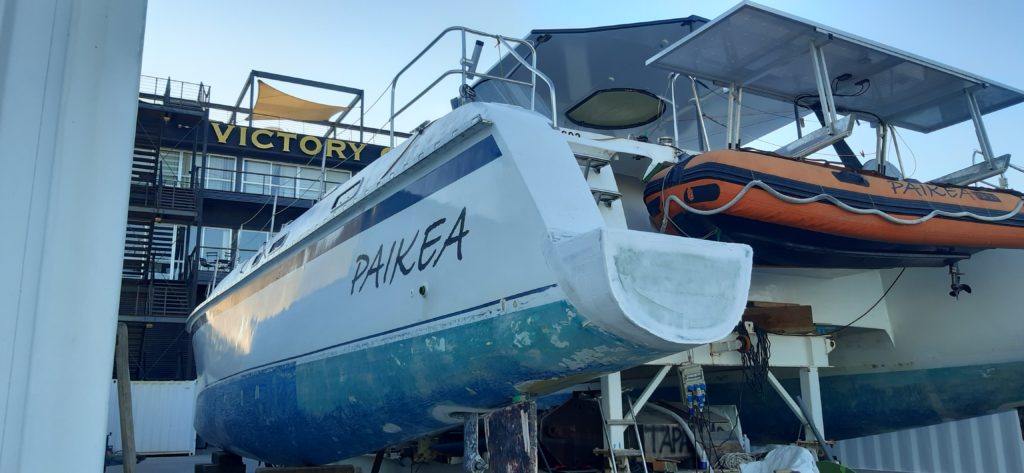
This modification was done for functionality, as the original step was difficult to access. The transom steps were tiny and did not allow room to stand comfortably on the lower platform. By extending the top of the step to meet the hull line, we were able to create a comfortable lower platform and improve access from the transoms. We did not actually extend the length of the boat in this project.
In terms of engineering, this was a simple build. As we were not extending the transom in the true sense of the word—only squaring up the step to give more room—the job did not require engineering for extra loads.
Materials Used:
- Airex C70 80kg/m³
- E-glass 400g/m² double bias
- E-glass 300g/m² cloth
- Polyester resin
- Fillers: Cabosil and Q-cell
- Peel ply
The Process:
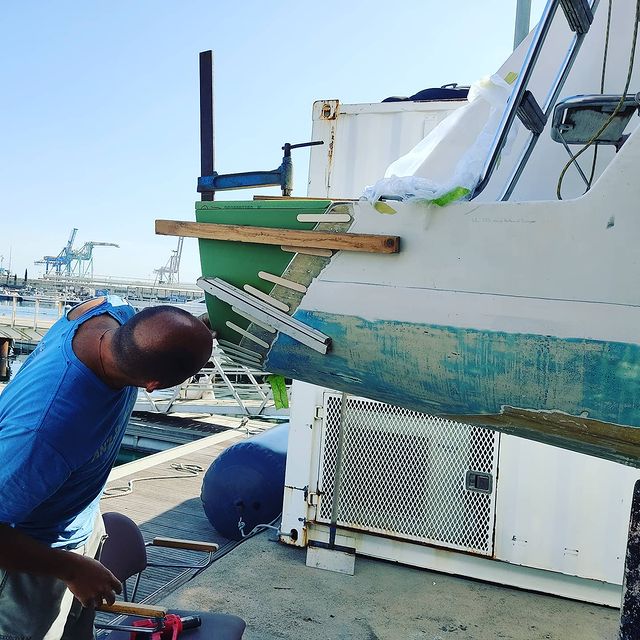
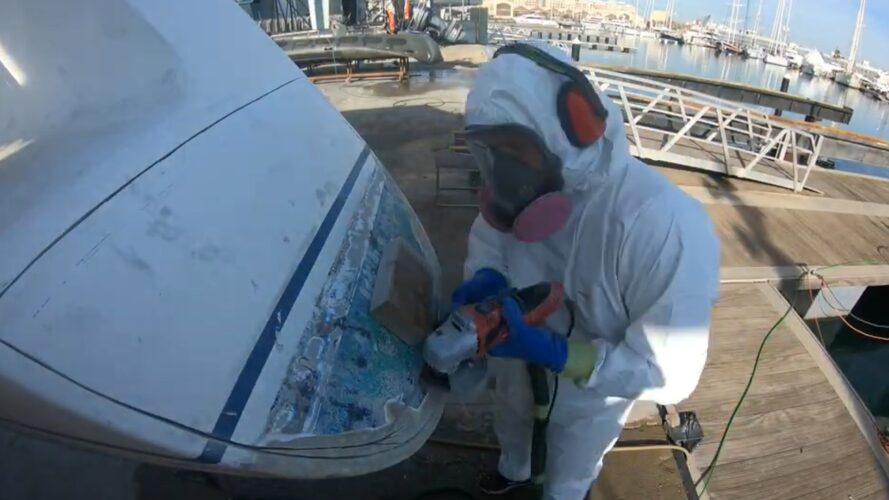
The existing transom was cut away using a 4″ grinder with a 1mm Ultradine cutoff blade. A chisel was then used for cleaning the rough edges.
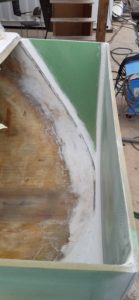
The entire interior of the transom was then sanded down first with 60-grit and then with 80-grit sandpaper. This was done for two reasons: to prepare the surface for the new join and for additional repairs that were needed in the area, including new shelves for the steering arms in the engine room.
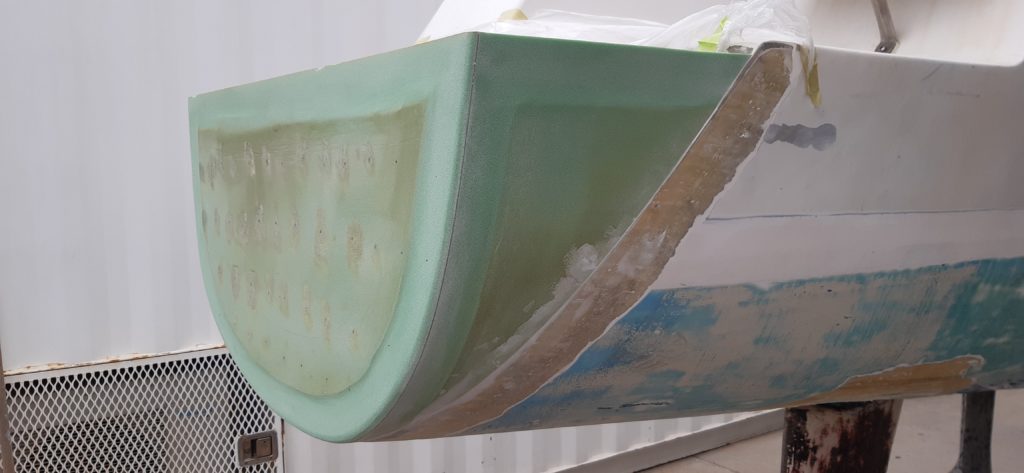
A 150mm section was sanded away on the perimeter of the exterior where the new join was to be made.
The foam was heated to allow it to form to the existing structure. Pieces were glued in place using polyester resin mixed with 20% Cabosil and 80% Q-cells, and then held in place with clamps and tongue depressor sticks that were hot-glued into place.
The inside skin on the sides was laminated at this stage. As the transom and step pieces were flat, the inside skin could be done on a table prior to fitting. A temporary oven was made using plastic and a bathroom heater to speed the curing process.
Once the inside skins were laminated, the transom and step pieces were glued into place using the same filler ratios as before.
The transoms were bogged and faired to finish the project.
The Result:
The transformation is both functional and aesthetic. We now have a beautiful, robust platform that makes entering and exiting the water a pleasure. It’s one of those upgrades that we use every single day and wonder how we ever managed without it.
See the Full Story: Related Blog Posts
More on our Transom upgrades can be found in the blog posts below.
- Major Hull Surgery: Transom Modifications, Fairing, and Sourcing an America’s Cup Rudder
 Executing multiple complex hull projects with a focus on structural integrity and performance gains. Author: Shayne & Anna Key Message: A systematic, professional approach allows multiple major refit projects to be run in parallel, turning a daunting workload into a series of manageable, high-impact upgrades. Introduction Transforming a boat’s… Read more: Major Hull Surgery: Transom Modifications, Fairing, and Sourcing an America’s Cup Rudder
 - The Pre-Splash Push: Integrating Engine Work, Composite Rudder Mods, and Custom Fairings
 Key Topic: Facing a firm launch deadline, we executed a coordinated final push on our catamaran’s critical systems. This involved servicing the saildrives, preparing new rudders for future winglets by installing a carbon rod backbone, and fabricating custom fairings to improve hull hydrodynamics. With a focus on… Read more: The Pre-Splash Push: Integrating Engine Work, Composite Rudder Mods, and Custom Fairings
 - Catana 42s Boat Tour – Aft SectionIn our previous video we told you why we bought a 33 year old catamaran instead of nice new shiny one. Now it’s time to take you on a tour of the old girl. This week is all about the aft end of the bus. The transom… Read more: Catana 42s Boat Tour – Aft Section
This one of the mods you have done that my wonderful wife reallly likes. I think I have it down except for how to bend the foam. A bit more help with that would be appreciated. Was the foam scored, if not, how hot do you need to get it, did you put it in an oven, will a heat gun work?
Cheers,
Ric
Hi Ric, it’s a great modification to Paikea and has really changed the way in which we are able to use her. Much nicer than the original arrangement. We will redo the steps on day soon too. To make the transom extension I used a heat gun to thermo form it. No cuts or scoring required. The foam was Airex C70.75. Hope this helps and apologies for the late reply.