Key Message: This post documents two distinct professional upgrades on our Catana 42 refit: the precise installation of custom composite deck hatches and the full conversion of leaky portlights to watertight, outward-opening hatches. The first section covers the use of 3D-printed jigs for perfect deck hatch alignment, while the second details the engineering behind designing and installing new side hatches with integrated gutter drainage systems. The focus throughout is on the methodology that ensures permanent, structurally sound results.
Author: Shayne and Anna
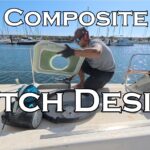
Professional Hatch Installation: Engineering a Permanent Solution
Introduction
On a performance vessel, every component must earn its keep. The original, leak-prone portlights on our Catana 42, Paikea, were a liability. This isn’t a story about a simple replacement; it’s a case study in how professional marine methodology tackles a common problem with an engineered, permanent solution. We’ll walk you through the key stages of installing a custom composite hatch, highlighting the precision techniques that define a professional-grade outcome.
The Flaw in the Original Design
The industry-standard inward-opening portlight is a proven design that has its place in offshore sailing vessels. However, its design invites water ingress, compromising habitability and safety especially when living on board. Our goal was not just to replace, but to re-engineer—converting the fitting to an outward-opening hatch with a fully integrated drainage system.
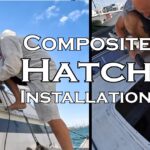
The Professional Methodology: Precision from Start to Finish
Amateur work is defined by guesswork; professional work is defined by process.
- Deck Analysis & Template Creation: We began by mapping the deck’s complex curvature to ensure the new frame would sit perfectly flush, respecting the original hull lines.
- Precision Cutting: Using a custom template, the deck hole was cut to exacting standards, accounting for the existing substrate and the new frame’s flange.
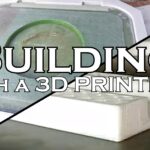
The Engineering Differentiator: 3D-Printed Tooling
For a one-off project, the cost of machined metal jigs is prohibitive. This is where modern technology transforms the workflow. We designed and manufactured a suite of 3D-printed tools:
- Custom Spacers: To guarantee a consistent 3mm gap around the entire hatch lid—a tolerance nearly impossible to maintain by hand across a curved surface.
- Drilling Jigs: To locate and drill hinge pilot holes with absolute positional accuracy in both the frame and the lid, ensuring perfect alignment and operation.
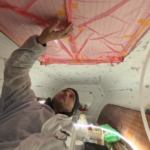
The Result: An Engineered, Watertight System
The final installation is a testament to this methodology. The hatch is structurally integral, aesthetically seamless, and features a built-in gutter that channels water to dedicated drains. The system has been proven effective in testing, handling rain without a single drop of ingress, even before the final sealant is applied.
Composite Hatch Build Playlist
The full series documenting the hatch construction from start to finish. The 3D print files for this project are available to Youngbarnacles members.
- Engineering Custom Composite Hatches: A Systematic Approach
 Topic: A detailed breakdown of the design and engineering process for creating custom composite deck hatches, covering problem analysis, material selection, structural integration, and the use of 3D printing for prototyping and manufacturing. Author: Shayne and Anna The original deck hatches on our Catana 42, Paikea, had served for over three decades. While built to last, their design… Read more: Engineering Custom Composite Hatches: A Systematic Approach
 - Building Composite Hatches Using 3D Printed MoldsKey Message: Precise, Accessible Fabrication with 3D Printed ToolingBuilding custom composite hatches requires tooling that can accurately capture complex geometry. This project demonstrates a practical approach: using 3D printed molds for both the hatch lid and its frame. This method allows for precise, repeatable fabrication of composite parts with seal gutters and complex profiles, bridging… Read more: Building Composite Hatches Using 3D Printed Molds
- Professional Hatch Installation: Solving Leaks with Precision EngineeringKey Message: This post documents two distinct professional upgrades on our Catana 42 refit: the precise installation of custom composite deck hatches and the full conversion of leaky portlights to watertight, outward-opening hatches. The first section covers the use of 3D-printed jigs for perfect deck hatch alignment, while the second details the engineering behind designing… Read more: Professional Hatch Installation: Solving Leaks with Precision Engineering
- Hull Weight Reduction & Flush Hatch Installation: Paikea Refit UpdateKey Message: Significant weight reduction is not just about going faster; it’s about returning a performance multihull to its designed potential, which requires a systematic, professional approach to refitting. Author: Anna and Shayne Introduction This refit update marks a turning point on Project Paikea. After years of incremental work, we are now executing a coordinated push to… Read more: Hull Weight Reduction & Flush Hatch Installation: Paikea Refit Update
- The Professional’s Approach: Replacing a Problematic Hatch with a Proven Structural PortlightTopic Overview: We permanently eliminate a chronic leak point and increase deck panel strength by removing a problematic overhead hatch and glassing in a solid, camber-matched core. In its place, we install a robust, under-gunwale structural portlight—applying proven marine engineering for a drier, stiffer, and more reliable cabin. Author: Shayne and Anna The Problem: When a… Read more: The Professional’s Approach: Replacing a Problematic Hatch with a Proven Structural Portlight