
Our Custom Mainsail Reefing System: How It All Works
A lot of reefing complaints come down to the same root cause: an undersized system trying to do a job it was never built for. Small 24mm track with basic sliders jams under real load, sails get hard to hoist, reefing downwind becomes genuinely difficult — and the sail, the halyard, or the technique usually gets blamed when the actual problem is a track and car system that’s simply too light for a multihull’s loads. Paikea’s reefing system was built specifically to not have that problem, and it’s worth walking through exactly how it works.
The Halyard Lock
At the heart of the system is a locking car at the head of the mainsail — genuinely one of the best upgrades on the boat. Once hoisted and locked, the head of the sail sits in exactly the same position every single time, which makes everything downstream easier: tack and cunningham positioning becomes consistent, reef points line up in the same place on the track every time, and marks and reference points actually mean something because nothing shifts between hoists.
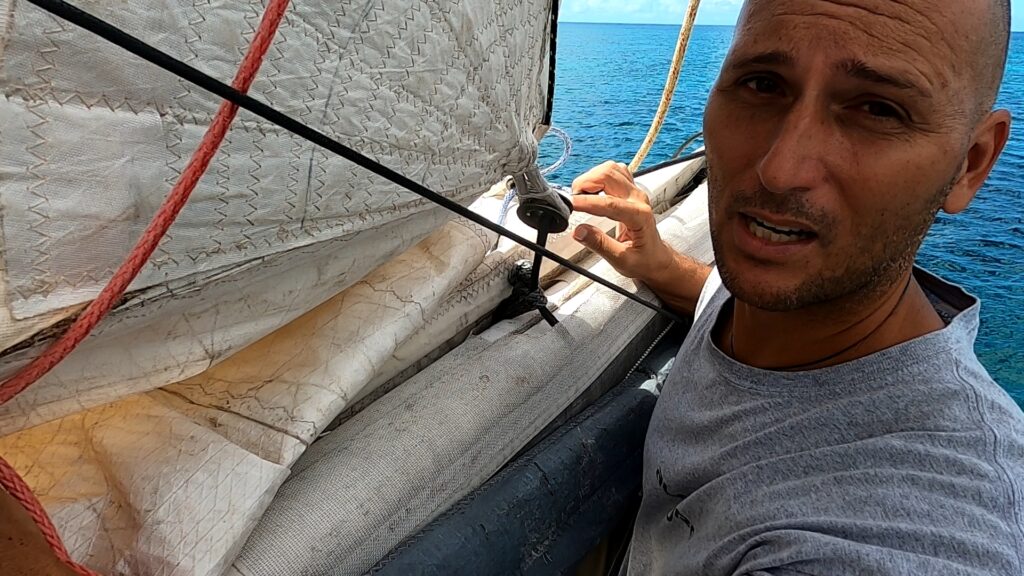
The mechanism itself uses a shock cord to hold the locking pin in the permanently-out, ready-to-lock position, released only by a trip line running down the luff of the sail with pull handles at each reef point. Critically, once locked, no sailing load ever sits on the halyard itself — the halyard’s only job is lifting and lowering the sail, with the car and track taking all the actual working load once it’s locked in.
This is also a genuine safety-critical design choice, not just a convenience feature: it’s a pull-to-engage system, meaning if anything ever fails — a line jams, a spring breaks — the failure mode defaults to unlocked, not locked. Boats built the opposite way, pull-to-disengage, risk a mainsail locked permanently at the masthead if something goes wrong with the release mechanism, with no way to bring it down. Built this way, a failure still leaves you able to drop the sail and sail on with a reduced rig — inconvenient, never catastrophic.
We put this lock through a proper real-world test not long after building it — full sail load, first sea trials, seeing whether the theory held up under genuine pressure. That story’s told in Sea Trials With Our New Mainsail: Proof-Loading the Front End.

Cars, Track, and Battens
The track and cars are deliberately oversized for the loads a multihull’s mainsail actually generates — 26mm, fully ball-bearing, genuinely expensive, and worth every cent of it. This is precisely the upgrade most reefing complaints are actually asking for, whether people realize it or not: a system grunty enough that hoisting and reefing simply aren’t a fight, in any conditions.
The battens are all C-Tech — chosen mainly because they don’t break. Spares live in the boom bag regardless, on the basis that you never want to discover you need one without having it on hand.
Front End Details
At the gooseneck, the cunningham runs through a tied lashing to the tack of the sail, alongside the trip line for the halyard lock system described above. All control lines — reefing lines, halyards, cunninghams — run from the base of the mast straight back across the cockpit top to a bank of clutches in the middle, keeping everything accessible in one place rather than scattered around the boat, and making any repair or line replacement straightforward since nothing’s buried or hard to reach.
The sail bag is a genuinely practical piece of the system too, not just storage — built from offcuts recycled from an old 3Di headsail. Not the ideal material for the job and showing real UV wear after years in the sun, but functional, and a good lazy jack and bag setup genuinely matters during reefing, catching and containing sail rather than letting it spill everywhere on deck mid-manoeuvre.
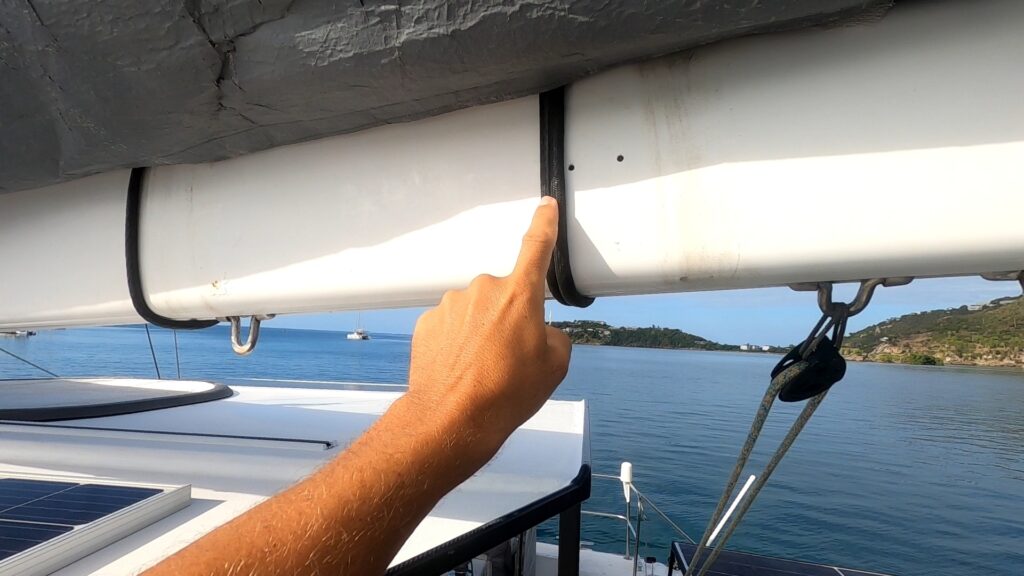
The boom itself is kept deliberately simple — a plain aluminium section with reef lines that loop around it on soft shackles rather than being permanently fixed. That means the whole reefing line setup can be adjusted, moved, or swapped out easily if a new sail goes on or a line needs replacing, with no metal fittings to jam or mesh incorrectly.
Reefing Line Material and Setup
The reef lines themselves run on Dyneema with a Spectra cover — chosen deliberately for two properties: the cover is slippery enough to run smoothly through a friction ring with minimal resistance, and it’s genuinely chafe-resistant. Reef lines should not wear out after a couple hundred miles — a properly specified system should handle thousands of miles without real degradation, and round-the-world race boats regularly run similar reefing systems for tens of thousands of miles without failure. If reef lines are chafing out quickly, that’s a sign something in the setup is wrong, not a normal wear pattern to just accept.
One genuine ongoing refinement: reefing line angle at the ring matters more than it might seem. Too flat an angle — pulling too far aft rather than roughly toward the masthead — pulls excessive tension into the foot of the sail rather than the leech, flattening the sail more than intended and, over time, stretching the foot out of shape. The fix is a second friction ring, redirecting the line’s path so the pull angle stays closer to correct rather than dragging the foot flat every time a reef goes in. It’s a small mechanical detail, but one with real consequences for sail shape and longevity if it’s ignored.
Sail construction plays into this too — Anna built reinforcing directly across the foot of the sail specifically to help resist this kind of reefing-induced stretch, using a Dyneema strop sewn in rather than standard webbing. Not every sailmaker does this. Cheaper cross-cut Dacron sails, without this kind of reinforcement at the reef points, tend to stretch out of shape quickly under exactly this load — a real, practical difference between a cheap sail and one built properly, and part of why a well-built sail tends to work out cheaper over its actual lifespan despite costing more upfront.
A soft shackle setup at each reef point also means a single reef line can serve more than one reef position — with three physical reef lines covering four actual reef points by unshackling and moving a line between positions as needed. It’s a small piece of rigging cleverness that saves real cost and complexity without losing functionality.
Working the System
Coming off the lock in practice is refreshingly simple: ease the mainsheet, open the clutch, ease the halyard down past the reference mark, and the car releases cleanly off the lock. From there, everything needed to put a reef in can be handled from the cockpit — the only exception being the cunningham, which needs a trip forward to move up one clip position as each reef goes in. On a boat set up specifically for short-handed sailing, a separate bank of clutches with one cunningham line per reef would remove even that trip forward entirely — but running as a fully crewed family boat, the simpler single-cunningham setup, with an occasional foredeck trip, works perfectly well.
Going back onto the lock requires that same forward trip, since re-engaging the lock means physically pulling the sail’s trip line at the mast. It’s the one deliberate trade-off in an otherwise fully cockpit-run system — accepted because the rest of the reefing process being this reliable and repeatable is worth one short trip forward.
In the Library
For the moment this halyard lock actually got proven — full load, first sea trials — see Sea Trials With Our New Mainsail: Proof-Loading the Front End. For the rest of Paikea’s sail and rigging build, see Paikea’s Sails.