Key Message: The de-bagging process confirmed a successful vacuum bag: our complex carbon fiber beam-to-hull joint emerged perfectly consolidated into tight corners, with a peel-ply finish ready for paint after minimal sanding. This technical success, however, came with the sobering reality of high-performance composites—a significant pile of single-use plastic waste, an inherent and unavoidable byproduct of achieving this level of structural integrity.
Author: Shayne and Anna
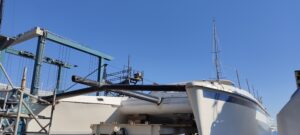
The moment of truth has arrived. We de-bagged our complex carbon fiber beam-to-hull joint to inspect the final laminate. This post walks through the results, showcasing the perfect consolidation in tight corners, the ready-for-paint finish, and the unavoidable reality of consumable waste in high-performance composites.
The De-Bagging Process: Peeling Back the Layers
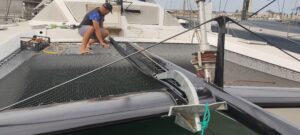
The reveal is a systematic process, reversing the order of the consumable stack.
- Removing the Bag: The first layer to come off is the vacuum bag itself. A successful seal means it releases easily, though it’s often contaminated with cured resin “needles” that prevent reuse.
- The Breather Felt & Perforated Film: Next, we peel away the breather felt, which is often saturated with excess resin. The perforated release film beneath it is the unsung hero, creating a barrier that allows resin to pass through but prevents the breather from bonding to the part.
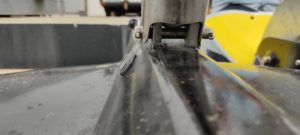
- The Final Layer: Peel Ply: The last consumable is the peel ply. When pulled back, it reveals the actual laminate surface—a uniform, resin-rich, and textured finish that is ideal for secondary bonding or paint after a light sand.
Pro-Tip Recap: The green masking tape under our tacky tape proved invaluable, allowing us to peel away the sticky residue effortlessly and leave a clean hull surface.
The Result: A Visual Inspection
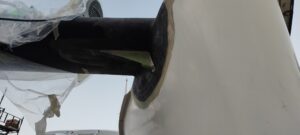
The primary goal of vacuum bagging is complete consolidation—pressing the laminate into every contour without voids or “bridging.” On that front, the project was a clear success.
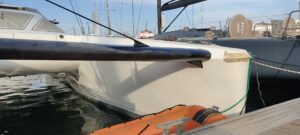
- Success in the Corners: The laminate is perfectly pressed into the complex concave area where the beam meets the hull, confirming that our strategy of segmented consumables and strategic pleating worked.
- The Resin Bleed: We observed more resin bleed-off than ideal, saturating the breather felt. This indicates efficient resin removal from the laminate (good for strength-to-weight) but means we used slightly more resin than necessary—a common trade-off.
The Finish: Ready for Paint
The surface left by the peel ply is exactly what we needed. The textured pattern provides an excellent key for paint, and only a very light sanding was required before the final coat, saving significant time in fairing.
The Unfortunate Reality: Composite Waste
A sobering part of the process is the pile of single-use consumables. The vacuum bag, breather felt, and perforated film are almost always destined for the landfill. Sharp, cured resin particles embedded in the bag create a high risk of punctures if reused, making it a necessary but significant environmental trade-off in high-performance boat building.
Conclusion & Next Steps
The vacuum bagging process was a technical success, resulting in a well-consolidated, strong, and clean carbon fiber joint. The part is now de-bagged and sanded, ready for the final stages: filler, a final sand, and paint. This brings us one major step closer to completing the structural core of Paikea’s refit.
Paikea Refit
Catch up on the entire beam project with the blog posts below:
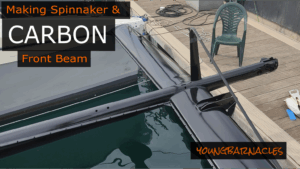
- Engineering a Carbon Fiber Front Beam & Longeron from America’s Cup Masts
 Key Message: By repurposing high-modulus carbon fiber from America’s Cup masts, we engineered a custom front-end system that is lighter, stronger, and far more functional than the original, unlocking new sail options and improving overall performance. Author: Shayne & Anna Introduction: A Dual Project Under Pressure… Read more: Engineering a Carbon Fiber Front Beam & Longeron from America’s Cup Masts
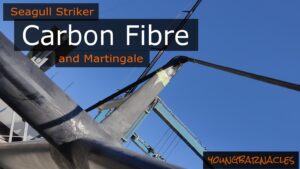
 - Reinforcing the Front Beam: Engineering a Carbon Fibre MartingaleAuthor: Shayne and Anna Key Topic: This post details the fabrication of our carbon fiber Seagull Striker and Martingale. We explain the engineering logic behind reinforcing the beam and show how we press-molded a high-strength unidirectional carbon strap to replace heavy stainless steel wire. The… Read more: Reinforcing the Front Beam: Engineering a Carbon Fibre Martingale
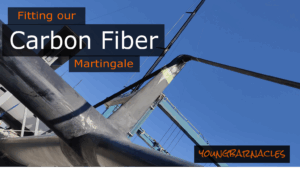
- Installing the Carbon Fibre Martingale: Precision Fitting & Engineering NuancesAuthor: Shayne & Anna TOPICS:This post details the final installation of a critical structural component on our Catana 42. It covers the transition from 3D CAD model to physical fitting, the use of specialist adhesives for marine composites, and an in-depth engineering discussion on the importance… Read more: Installing the Carbon Fibre Martingale: Precision Fitting & Engineering Nuances
- Beyond Flat Panels: Vacuum Bagging a Complex Carbon Fiber Beam-to-Hull Joint
 Topic: Successfully vacuum bagging a structural joint is the true test of composite skill. This guide details the advanced techniques for consolidating a carbon fiber laminate on a complex, multi-dimensional beam-to-hull connection. We break down the entire process, from strategic surface prep and consumable strategy… Read more: Beyond Flat Panels: Vacuum Bagging a Complex Carbon Fiber Beam-to-Hull Joint
 - The Pre-Splash Push: Integrating Engine Work, Composite Rudder Mods, and Custom FairingsKey Topic: Facing a firm launch deadline, we executed a coordinated final push on our catamaran’s critical systems. This involved servicing the saildrives, preparing new rudders for future winglets by installing a carbon rod backbone, and fabricating custom fairings to improve hull hydrodynamics. With a… Read more: The Pre-Splash Push: Integrating Engine Work, Composite Rudder Mods, and Custom Fairings
- The Vacuum Bag Reveal: Assessing Our Carbon Fiber Beam LaminateKey Message: The de-bagging process confirmed a successful vacuum bag: our complex carbon fiber beam-to-hull joint emerged perfectly consolidated into tight corners, with a peel-ply finish ready for paint after minimal sanding. This technical success, however, came with the sobering reality of high-performance composites—a significant… Read more: The Vacuum Bag Reveal: Assessing Our Carbon Fiber Beam Laminate
- Engineering a Bespoke Forestay Attachment & Mastering “Wet Preg”Key Topic: Replacing our catamaran’s aluminum beam with carbon fiber meant reinventing how critical components attach. For the forestay, this led to a unique engineering solution: a custom transverse pin and slot system that channels load directly into the unidirectional carbon of our recycled America’s Cup… Read more: Engineering a Bespoke Forestay Attachment & Mastering “Wet Preg”
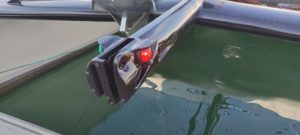
- Carbon Fiber Anchor Roller & Stealth Nav Lights – Finishing Paikea’s Front EndKey Message: With the major structural work complete, we’re adding the final functional details to Paikea’s new carbon front end. This post covers the fabrication of a custom carbon fiber anchor roller, the installation of stealth navigation lights hidden within our America’s Cup mast bow pole, and the upgrade to a raised… Read more: Carbon Fiber Anchor Roller & Stealth Nav Lights – Finishing Paikea’s Front End
- From Racing Mast to Custom Bow Pole: Reincarnating America’s Cup CarbonKey Topic: This upgrade represents the ultimate expression of our refit philosophy: giving the world’s best materials a brilliant second life. We transformed salvaged sections of an America’s Cup mast into a complete, custom carbon fiber bow pole—the final and most rewarding piece of our new… Read more: From Racing Mast to Custom Bow Pole: Reincarnating America’s Cup Carbon
- Why We Chose Dyneema for Our Catamaran Trampoline (And How to Install It)Author: Shayne and Anna After completing our major carbon fiber front beam transformation, the final piece was installing a trampoline worthy of the upgrade. We chose Dyneema netting—the same high-performance material used for racing halyards—and installed it using professional separate lashing techniques. This approach creates an… Read more: Why We Chose Dyneema for Our Catamaran Trampoline (And How to Install It)
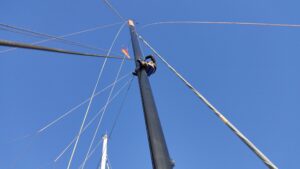
- From America’s Cup to Our Catamaran: Rescuing a Carbon LegendAuthor: Shayne and Anna Key Message: The centerpiece of our rig is a mast with a legendary past: Rig #12 from Team New Zealand’s 2000 America’s Cup campaign. Rescued from a Valencia scrapyard where it was destined to be chopped into pieces, this carbon fiber wing mast represents… Read more: From America’s Cup to Our Catamaran: Rescuing a Carbon Legend
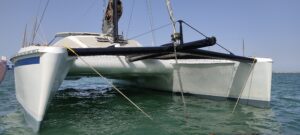
- Real-World Test: How Our New Carbon Front Beam Handled a Choppy SeaAuthor: Shayne and Anna Key Message: This sea trial proved that true performance isn’t just about strength or weight savings, but about how upgrades transform the sailing experience in real-world conditions. Despite the inevitable “breakdowns” that accompany any major refit, the immediate and tangible improvements—a… Read more: Real-World Test: How Our New Carbon Front Beam Handled a Choppy Sea
- Carbon Fiber vs. Aluminum Beam: A Catamaran Structural UpgradeTopic: We replaced our Catamaran 42’s original aluminum front beam with a custom carbon fiber beam and longeron. This wasn’t just a simple material swap; it was a complete structural redesign. In this deep dive, we break down the critical engineering concept of load paths, explaining… Read more: Carbon Fiber vs. Aluminum Beam: A Catamaran Structural Upgrade
- The Carbon Fiber Longeron & America’s Cup Rig: Dual Upgrades That Transformed Our CatamaranAuthor: Shayne and Anna Key Topic: While our salvaged America’s Cup rotating rig was a monumental upgrade, the custom carbon fiber longeron stands as its crucial counterpart, fundamentally changing how we sail. This massive central pole—fabricated from the same batch of recycled America’s Cup mast sections—eliminated… Read more: The Carbon Fiber Longeron & America’s Cup Rig: Dual Upgrades That Transformed Our Catamaran